下载ELK
下载地址:https://www.elastic.co/downloads
linux可直接执行:wget https://artifacts.elastic.co/downloads/elasticsearch/elasticsearch-7.4.0.tar.gz
现在完成后解压缩
tar xvf elasticsearch-7.4.0.tar.gz
安装JDK
由于elasticsearch启动需要安装JDK,如何安装就不再赘述了。
配置elasticsearch并启动
修改配置文件,并在最下方加入以下几行:vim elasticsearch-7.4.0/config/elasticsearch.yml
cluster.name: elk-application
node.name: master
path.data: /data/elk/es-data/
path.logs: /data/elk/es-logs/
bootstrap.memory_lock: false
bootstrap.system_call_filter: false
network.host: 0.0.0.0
http.cors.enabled: true
cluster.initial_master_nodes: ["master"]
discovery.seed_hosts: ["127.0.0.1:9200"]
http.cors.allow-origin: "*"
在启动前需要先创建elasticsearch的启动用户,root用户是不能直接启动的。否则会报如下错误:

创建elsearch用户组及elsearch用户
groupadd elk
useradd elk -g elk
更改elasticsearch-6.4.2文件夹及内部文件的所属用户及组为elsearch:elsearch
cd切换到elasticsearch的父路径下
chown -R elk:elk elk/
切换到elsearch用户再启动
su elsearch
cd elasticsearch-7.4.0/bin
sh elasticsearch -d
启动时报错:

常见的问题有三个,也是比较好解决,只需修改系统配置即可:
问题1:
max file descriptors [4096] for elasticsearch process is too low, increase to at least [65536]
解决方法:
#切换到root用户修改
vim /etc/security/limits.conf
# 在最后面追加下面内容
elk hard nofile 65536
elk soft nofile 65536
修改后重新登录 elsearch用户,使用如下命令查看是否修改成功
ulimit -Hn 65536

问题:
max virtual memory areas vm.max_map_count [65530] is too low, increase to at least [262144]
解决方法 提高vm.max_map_count 的大小
# 切换到root用户
vim /etc/sysctl.conf
# 在最后面追加下面内容
vm.max_map_count=262144
# 使用 sysctl -p 查看修改后的结果
sysctl -p

问题:
Java HotSpot(TM) 64-Bit Server VM warning: INFO: os::commit_memory(0x0000000085330000, 2060255232, 0) failed; error='Cannot allocate memory' (errno=12)
解决方法:
# 由于elasticsearch5.0默认分配jvm空间大小为2g,修改jvm空间分配
# 如果使用虚拟机安装,内存最好不小于2G
# vim config/jvm.options
-Xms512m
-Xmx512m
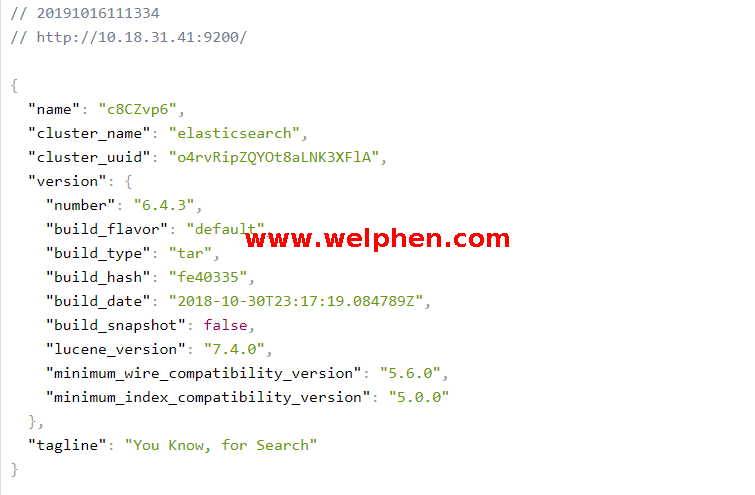
启动完成后,可以在浏览器输入url: ip:9200 查看是否成功启动,如图:

配置kibana
从elsearch用户先切换为root.exit
vim config/kibana.yml将以下内容添加到文件最下方,我用的是7.4.0的版本所以elasticsearch.hosts不一样。
server.port: 5601
server.name: "kibana-uids"
server.host: "0.0.0.0"
elasticsearch.hosts: ["http://localhost:9200"]
kibana.index: ".kibana"
i18n.locale: "zh-CN"
配置完成后启动即可
sh kibana --allow-root &
然后打开浏览器访问:http://ip:5601,如果启动成功如下图:
配置logStash
配置logstash收集tomcat和微服务的日志,并将收集到的日志发送到elasticsearch。
input {
  file {
        type => "file"
        path => "/usr/local/tomcat8/logs/*.log"
        start_position => "beginning"
    }
  file {
        type => "file"
        path => "/usr/local/tomcat8/logs/*.out"
        start_position => "beginning"
    }
file {
        type => "file"
        path => "/usr/local/micro-service/logs/*.out"
        start_position => "beginning"
    }
}
filter {
        geoip {
                source => "clientIp"
        }
}
output {
  elasticsearch {
    hosts => ["http://localhost:9200"]
    index => "log-%{+YYYY.MM.dd}"
    }
}
配置完成后使用该命令启动
./logstash -f ../config/logstash-log4j.conf &
然后打开kibana添加日志索引即可看到系统日志,后续会将其他服务比如Nginx和Apache的日志配置到Logstash。