Java 23种设计模式学习笔记
前言
作为一名混迹软件行业多年的从业者,一直希望能够系统地学习设计模式,并将学习过程记录下来。包括每种模式的概念、作用、适用场景以及示例代码,希望在以后的开发过程中能够随时查阅。
什么是设计模式?
设计模式是软件开发人员在软件开发过程中面临的一般问题的解决方案。这些解决方案是众多软件开发人员经过相当长的一段时间的试验和错误总结出来的。
设计模式的四大基本要素:
- 模式名称:一个助记的名字,用来描述模式的问题、解决方案和效果
- 问题:描述了应该在何时使用模式
- 解决方案:描述了设计的组成部分、它们之间的相互关系及各自的职责和协作方式
- 效果:描述了模式应用的效果及使用模式应权衡的问题
设计模式的分类
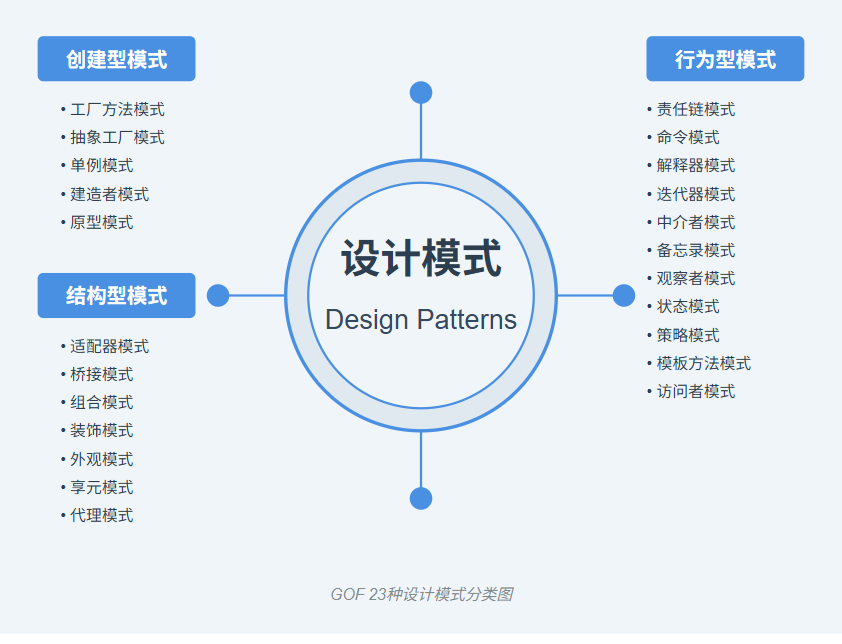
根据《设计模式:可复用面向对象软件的基础》一书中的分类方式,23种设计模式可分为三大类:
- 创建型模式:提供创建对象的机制,增加已有代码的灵活性和可复用性
- 结构型模式:介绍如何将对象和类组装成较大的结构,并同时保持结构的灵活和高效
- 行为型模式:负责对象间的高效沟通和职责委派
创建型模式
1. 单例模式 (Singleton Pattern)
概念
单例模式确保一个类只有一个实例,并提供一个全局访问点来访问这个唯一实例。
作用
- 保证一个类仅有一个实例,并提供一个访问它的全局访问点
- 控制共享资源的并发访问
- 节约系统资源,提高系统性能
适用场景
- 需要频繁创建和销毁的对象
- 创建对象时耗时过多或耗资源过多的对象
- 工具类对象
- 频繁访问数据库或文件的对象
实现示例
// 懒汉式,线程不安全
public class Singleton {
    private static Singleton instance;
    private Singleton() {}

    public static Singleton getInstance() {
        if (instance == null) {
            instance = new Singleton();
        }
        return instance;
    }
}

// 懒汉式,线程安全
public class Singleton {
    private static Singleton instance;
    private Singleton() {}

    public static synchronized Singleton getInstance() {
        if (instance == null) {
            instance = new Singleton();
        }
        return instance;
    }
}

// 饿汉式
public class Singleton {
    private static Singleton instance = new Singleton();
    private Singleton() {}

    public static Singleton getInstance() {
        return instance;
    }
}

// 双重校验锁
public class Singleton {
    private volatile static Singleton instance;
    private Singleton() {}

    public static Singleton getInstance() {
        if (instance == null) {
            synchronized (Singleton.class) {
                if (instance == null) {
                    instance = new Singleton();
                }
            }
        }
        return instance;
    }
}

// 静态内部类
public class Singleton {
    private Singleton() {}

    private static class SingletonHolder {
        private static final Singleton INSTANCE = new Singleton();
    }

    public static Singleton getInstance() {
        return SingletonHolder.INSTANCE;

}

// 枚举
public enum Singleton {
    INSTANCE;

    public void doSomething() {
        // 业务方法
    }
}
小结
单例模式是最常用的设计模式之一,在Spring框架中大量使用。不同的实现方式有不同的特点,需要根据具体场景选择合适的实现方式。枚举实现是最为推荐的方式,它天然就是单例的,而且能防止反射和序列化破坏单例。
2. 工厂方法模式 (Factory Method Pattern)
概念
工厂方法模式定义了一个创建对象的接口,但由子类决定要实例化的类是哪一个。工厂方法让类的实例化推迟到子类中进行。
作用
- 隐藏了对象创建的实现细节
- 客户端不需要修改代码,只需要修改配置文件
- 更加符合开闭原则
适用场景
- 不知道使用对象的确切类型
- 希望系统能够扩展并且维护,不希望修改原有的代码
实现示例
// 抽象产品
interface Product {
    void use();
}

// 具体产品A
class ConcreteProductA implements Product {
    @Override
    public void use() {
        System.out.println("使用产品A");
    }
}

// 具体产品B
class ConcreteProductB implements Product {
    @Override
    public void use() {
        System.out.println("使用产品B");
    }
}

// 抽象工厂
interface Factory {
    Product createProduct();
}

// 具体工厂A
class ConcreteFactoryA implements Factory {
    @Override
    public Product createProduct() {
        return new ConcreteProductA();
    }
}

// 具体工厂B
class ConcreteFactoryB implements Factory {
    @Override
    public Product createProduct() {
        return new ConcreteProductB();
    }
}

// 客户端代码
public class Client {
    public static void main(String[] args) {
        Factory factoryA = new ConcreteFactoryA();
        Product productA = factoryA.createProduct();
        productA.use();

        Factory factoryB = new ConcreteFactoryB();
        Product productB = factoryB.createProduct();
        productB.use();
    }
}
小结
工厂方法模式是我们最常用的实例化对象模式,是用工厂方法代替new操作的一种模式。在创建对象时不会对客户端暴露创建逻辑,通过使用一个共同的接口来指向新创建的对象。
3. 抽象工厂模式 (Abstract Factory Pattern)
概念
抽象工厂模式提供一个创建一系列相关或相互依赖对象的接口,而无需指定它们具体的类。
作用
- 提供一个创建一系列相关或相互依赖对象的接口,而无需指定它们具体的类
- 将一组对象的实现细节与它们的使用分离
- 能够方便地切换产品族
适用场景
- 一个系统要独立于它的产品的创建、组合和表示
- 一个系统要由多个产品系列中的一个来配置
- 需要强调一系列相关的产品对象的设计以便进行联合使用
实现示例
// 抽象产品A
interface AbstractProductA {
    void operationA();
}

// 抽象产品B
interface AbstractProductB {
    void operationB();
}

// 具体产品A1
class ConcreteProductA1 implements AbstractProductA {
    @Override
    public void operationA() {
        System.out.println("具体产品A1的方法");
    }
}

// 具体产品A2
class ConcreteProductA2 implements AbstractProductA {
    @Override
    public void operationA() {
        System.out.println("具体产品A2的方法");
    }
}

// 具体产品B1
class ConcreteProductB1 implements AbstractProductB {
    @Override
    public void operationB() {
        System.out.println("具体产品B1的方法");
    }
}

// 具体产品B2
class ConcreteProductB2 implements AbstractProductB {
    @Override
    public void operationB() {
        System.out.println("具体产品B2的方法");
    }
}

// 抽象工厂
interface AbstractFactory {
    AbstractProductA createProductA();
    AbstractProductB createProductB();
}

// 具体工厂1
class ConcreteFactory1 implements AbstractFactory {
    @Override
    public AbstractProductA createProductA() {
        return new ConcreteProductA1();
    }

    @Override
    public AbstractProductB createProductB() {
        return new ConcreteProductB1();
    }
}

// 具体工厂2
class ConcreteFactory2 implements AbstractFactory {
    @Override
    public AbstractProductA createProductA() {
        return new ConcreteProductA2();
    }

    @Override
    public AbstractProductB createProductB() {
        return new ConcreteProductB2();
    }
}

// 客户端代码
public class Client {
    public static void main(String[] args) {
        // 使用第一个工厂创建产品
        AbstractFactory factory1 = new ConcreteFactory1();
        AbstractProductA productA1 = factory1.createProductA();
        AbstractProductB productB1 = factory1.createProductB();
        productA1.operationA();
        productB1.operationB();

        // 使用第二个工厂创建产品
        AbstractFactory factory2 = new ConcreteFactory2();
        AbstractProductA productA2 = factory2.createProductA();
        AbstractProductB productB2 = factory2.createProductB();
        productA2.operationA();
        productB2.operationB();
    }
}
小结
抽象工厂模式和工厂方法模式的区别在于,工厂方法模式针对的是一个产品等级结构,而抽象工厂模式则需要面对多个产品等级结构。当一个工厂等级结构可以创建出分属于不同产品等级结构的一个产品族中的所有对象时,抽象工厂模式比工厂方法模式更为适用。
4. 建造者模式 (Builder Pattern)
概念
建造者模式将一个复杂对象的构建与它的表示分离,使得同样的构建过程可以创建不同的表示。
作用
- 将一个复杂对象的构建与其表示分离,使得同样的构建过程可以创建不同的表示
- 允许用户只通过指定复杂对象的类型和内容就可以构建它们,用户不需要知道内部的具体构建细节
适用场景
- 需要生成的对象具有复杂的内部结构
- 需要生成的对象内部属性本身相互依赖
- 对象的创建过程独立于创建该对象的类
- 隔离复杂对象的创建和使用,并使得相同的创建过程可以创建不同的产品
实现示例
// 产品类
class Product {
    private String partA;
    private String partB;
    private String partC;

    public void setPartA(String partA) {
        this.partA = partA;
    }

    public void setPartB(String partB) {
        this.partB = partB;
    }

    public void setPartC(String partC) {
        this.partC = partC;
    }

    public void show() {
        System.out.println("产品创建完成,部件A:" + partA + ",部件B:" + partB + ",部件C:" + partC);
    }
}

// 抽象建造者
abstract class Builder {
    protected Product product = new Product();

    public abstract void buildPartA();
    public abstract void buildPartB();
    public abstract void buildPartC();

    public Product getResult() {
        return product;
    }
}

// 具体建造者1
class ConcreteBuilder1 extends Builder {
    @Override
    public void buildPartA() {
        product.setPartA("部件A1");
    }

    @Override
    public void buildPartB() {
        product.setPartB("部件B1");
    }

    @Override
    public void buildPartC() {
        product.setPartC("部件C1");
    }
}

// 具体建造者2
class ConcreteBuilder2 extends Builder {
    @Override
    public void buildPartA() {
        product.setPartA("部件A2");
    }

    @Override
    public void buildPartB() {
        product.setPartB("部件B2");
    }

    @Override
    public void buildPartC() {
        product.setPartC("部件C2");
    }
}

// 指挥者
class Director {
    public Product construct(Builder builder) {
        builder.buildPartA();
        builder.buildPartB();
        builder.buildPartC();
        return builder.getResult();
    }
}

// 客户端代码
public class Client {
    public static void main(String[] args) {
        Director director = new Director();
        Builder builder1 = new ConcreteBuilder1();
        Builder builder2 = new ConcreteBuilder2();

        Product product1 = director.construct(builder1);
        product1.show();

        Product product2 = director.construct(builder2);
        product2.show();
    }
}
现代Java中的建造者模式
在现代Java开发中,建造者模式常常被简化,使用链式调用和流式接口:
// 使用链式调用的建造者模式
public class Product {
    private String partA;
    private String partB;
    private String partC;

    private Product(Builder builder) {
        this.partA = builder.partA;
        this.partB = builder.partB;
        this.partC = builder.partC;
    }

    public void show() {
        System.out.println("产品创建完成,部件A:" + partA + ",部件B:" + partB + ",部件C:" + partC);
    }

    public static class Builder {
        private String partA;
        private String partB;
        private String partC;

        public Builder partA(String partA) {
            this.partA = partA;
            return this;
        }

        public Builder partB(String partB) {
            this.partB = partB;
            return this;
        }

        public Builder partC(String partC) {
            this.partC = partC;
            return this;
        }

        public Product build() {
            return new Product(this);
        }
    }
}

// 客户端代码
public class Client {
    public static void main(String[] args) {
        Product product = new Product.Builder()
            .partA("部件A")
            .partB("部件B")
            .partC("部件C")
            .build();
        product.show();
    }
}
小结
建造者模式在处理复杂对象创建时非常有用,尤其是当一个对象有多个可选参数时。在Java中,许多库和框架都使用了建造者模式,如StringBuilder、DocumentBuilder等。现代Java中的链式调用方式使得建造者模式更加简洁易用。
5. 原型模式 (Prototype Pattern)
概念
原型模式是用原型实例指定创建对象的种类,并且通过拷贝这些原型来创建新的对象。
作用
- 用原型实例指定创建对象的种类,并且通过拷贝这些原型创建新的对象
- 隐藏了对象创建的细节
- 在一些需要频繁创建对象的场景下,可以提高性能
适用场景
- 当一个系统应该独立于它的产品创建、构成和表示时
- 当要实例化的类是在运行时刻指定时
- 为了避免创建一个与产品类层次平行的工厂类层次时
- 当对象的创建过于复杂或者说资源消耗过多时
实现示例
// 原型接口
interface Prototype extends Cloneable {
    Prototype clone();
    void show();
}

// 具体原型类
class ConcretePrototype implements Prototype {
    private String name;

    public ConcretePrototype(String name) {
        this.name = name;
    }

    @Override
    public Prototype clone() {
        try {
            return (Prototype) super.clone();
        } catch (CloneNotSupportedException e) {
            e.printStackTrace();
            return null;
        }
    }

    @Override
    public void show() {
        System.out.println("具体原型" + name);
    }
}

// 客户端代码
public class Client {
    public static void main(String[] args) {
        ConcretePrototype prototype = new ConcretePrototype("原始对象");
        prototype.show();

        ConcretePrototype clonePrototype = (ConcretePrototype) prototype.clone();
        clonePrototype.show();
    }
}
深拷贝与浅拷贝
// 浅拷贝示例
class Address {
    private String city;

    public Address(String city) {
        this.city = city;
    }

    public String getCity() {
        return city;
    }

    public void setCity(String city) {
        this.city = city;
    }
}

class Person implements Cloneable {
    private String name;
    private Address address;

    public Person(String name, Address address) {
        this.name = name;
        this.address = address;
    }

    // 浅拷贝
    @Override
    public Person clone() {
        try {
            return (Person) super.clone();
        } catch (CloneNotSupportedException e) {
            e.printStackTrace();
            return null;
        }
    }

    public void display() {
        System.out.println("姓名:" + name + ",城市:" + address.getCity());
    }

    public Address getAddress() {
        return address;
    }
}

// 深拷贝示例
class DeepPerson implements Cloneable {
    private String name;
    private Address address;

    public DeepPerson(String name, Address address) {
        this.name = name;
        this.address = address;
    }

    // 深拷贝
    @Override
    public DeepPerson clone() {
        try {
            DeepPerson person = (DeepPerson) super.clone();
            // 创建新的Address对象
            person.address = new Address(this.address.getCity());
            return person;
        } catch (CloneNotSupportedException e) {
            e.printStackTrace();
            return null;
        }
    }

    public void display() {
        System.out.println("姓名:" + name + ",城市:" + address.getCity());
    }

    public Address getAddress() {
        return address;
    }
}

// 客户端测试
public class Client {
    public static void main(String[] args) {
        // 测试浅拷贝
        Address address = new Address("北京");
        Person original = new Person("张三", address);
        Person clone = original.clone();

        System.out.println("原始对象与浅拷贝对象地址是否相同:" + (original == clone));
        System.out.println("原始对象与浅拷贝对象的Address是否相同:" + (original.getAddress() == clone.getAddress()));

        clone.getAddress().setCity("上海");
        System.out.println("修改浅拷贝对象的Address后:");
        original.display(); // 原始对象也会受影响
        clone.display();

        // 测试深拷贝
        Address address2 = new Address("北京");
        DeepPerson original2 = new DeepPerson("李四", address2);
        DeepPerson clone2 = original2.clone();

        System.out.println("原始对象与深拷贝对象地址是否相同:" + (original2 == clone2));
        System.out.println("原始对象与深拷贝对象的Address是否相同:" + (original2.getAddress() == clone2.getAddress()));

        clone2.getAddress().setCity("上海");
        System.out.println("修改深拷贝对象的Address后:");
        original2.display(); // 原始对象不受影响
        clone2.display();
    }
}
小结
原型模式在Java中的实现比较简单,主要利用了Object类的clone()方法。但需要注意的是,浅拷贝与深拷贝的区别。浅拷贝只复制对象本身,而不复制对象内部的引用,而深拷贝则会复制对象内部的引用。在实际应用中,需要根据具体情况选择合适的拷贝方式。
结构型模式
6. 适配器模式 (Adapter Pattern)
概念
适配器模式将一个类的接口转换成客户希望的另外一个接口,使得原本由于接口不兼容而不能一起工作的那些类可以一起工作。
作用
- 将一个类的接口转换成客户期望的另一个接口
- 使接口不兼容的类可以一起工作
- 复用已有的类,无需修改原有代码
适用场景
- 想使用一个已存在的类,但其接口不符合你的需求
- 想创建一个可以复用的类,该类可以与其他不相关的类或不可预见的类协同工作
- 想使用一些已经存在的子类,但不可能对每一个子类都进行子类化以匹配它们的接口
实现示例 - 类适配器模式
// 目标接口
interface Target {
    void request();
}

// 被适配的类
class Adaptee {
    public void specificRequest() {
        System.out.println("被适配者的方法");
    }
}

// 类适配器
class ClassAdapter extends Adaptee implements Target {
    @Override
    public void request() {
        specificRequest();
    }
}

// 客户端代码
public class Client {
    public static void main(String[] args) {
        Target target = new ClassAdapter();
        target.request();
    }
}
实现示例 - 对象适配器模式
// 目标接口
interface Target {
    void request();
}

// 被适配的类
class Adaptee {
    public void specificRequest() {
        System.out.println("被适配者的方法");
    }
}

// 对象适配器
class ObjectAdapter implements Target {
    private Adaptee adaptee;

    public ObjectAdapter(Adaptee adaptee) {
        this.adaptee = adaptee;
    }

    @Override
    public void request() {
        adaptee.specificRequest();
    }
}

// 客户端代码
public class Client {
    public static void main(String[] args) {
        Adaptee adaptee = new Adaptee();
        Target target = new ObjectAdapter(adaptee);
        target.request();
    }
}
实际应用实例
// 例如:将第三方库的日期处理适配到你自己的系统

// 第三方日期类
class ThirdPartyDateUtil {
    public String formatDate(Date date, String pattern) {
        SimpleDateFormat formatter = new SimpleDateFormat(pattern);
        return formatter.format(date);
    }
}

// 我们系统期望的接口
interface DateFormatter {
    String format(LocalDateTime dateTime);
}

// 适配器
class DateFormatterAdapter implements DateFormatter {
    private ThirdPartyDateUtil dateUtil;

    public DateFormatterAdapter(ThirdPartyDateUtil dateUtil) {
        this.dateUtil = dateUtil;
    }

    @Override
    public String format(LocalDateTime dateTime) {
        // 将LocalDateTime转换为Date
        Date date = Date.from(dateTime.atZone(ZoneId.systemDefault()).toInstant());
        return dateUtil.formatDate(date, "yyyy-MM-dd HH:mm:ss");
    }
}

// 客户端代码
public class Client {
    public static void main(String[] args) {
        ThirdPartyDateUtil dateUtil = new ThirdPartyDateUtil();
        DateFormatter formatter = new DateFormatterAdapter(dateUtil);

        LocalDateTime now = LocalDateTime.now();
        System.out.println("格式化后的日期:" + formatter.format(now));
    }
}
小结
适配器模式是一种结构型设计模式,它能使接口不兼容的对象能够相互合作。这种模式在系统需要使用现有类,但这些类的接口不符合系统需求时非常有用。适配器模式有两种实现方式:类适配器(通过继承)和对象适配器(通过组合),一般推荐使用对象适配器,因为它更加灵活。在Java中,适配器模式使用非常广泛,如 java.io.InputStreamReader(InputStream) 就是将字节流适配成字符流的适配器。
7. 桥接模式 (Bridge Pattern)
概念
桥接模式将抽象部分与它的实现部分分离,使它们都可以独立地变化。
作用
- 将抽象与实现分离,使它们可以独立变化
- 避免在有多种可能会变化的情况下,用继承导致类爆炸问题
- 实现细节对客户透明
适用场景
- 不希望在抽象和它的实现部分之间有一个固定的绑定关系
- 类的抽象以及它的实现都应该可以通过生成子类的方法加以扩充
- 对一个抽象的实现部分的修改应对客户不产生影响
- 有多个维度变化的系统
实现示例
// 实现部分的接口
interface Implementor {
    void operationImpl();
}

// 具体实现A
class ConcreteImplementorA implements Implementor {
    @Override
    public void operationImpl() {
        System.out.println("具体实现A");
    }
}

// 具体实现B
class ConcreteImplementorB implements Implementor {
    @Override
    public void operationImpl() {
        System.out.println("具体实现B");
    }
}

// 抽象部分
abstract class Abstraction {
    protected Implementor implementor;

    public Abstraction(Implementor implementor) {
        this.implementor = implementor;
    }

    public abstract void operation();
}

// 扩展抽象部分
class RefinedAbstraction extends Abstraction {
    public RefinedAbstraction(Implementor implementor) {
        super(implementor);
    }

    @Override
    public void operation() {
        System.out.print("扩展抽象部分的操作:");
        implementor.operationImpl();
    }
}

// 客户端代码
public class Client {
    public static void main(String[] args) {
        Implementor implA = new ConcreteImplementorA();
        Abstraction abstractionA = new RefinedAbstraction(implA);
        abstractionA.operation();

        Implementor implB = new ConcreteImplementorB();
        Abstraction abstractionB = new RefinedAbstraction(implB);
        abstractionB.operation();
    }
}
实际应用示例 - 不同平台上的不同类型的消息发送
// 抽象部分 - 消息类型
abstract class Message {
    protected MessageSender messageSender;

    public Message(MessageSender messageSender) {
        this.messageSender = messageSender;
    }

    public abstract void send();
}

// 扩展抽象 - 普通消息
class CommonMessage extends Message {
    private String content;

    public CommonMessage(MessageSender messageSender, String content) {
        super(messageSender);
        this.content = content;
    }

    @Override
    public void send() {
        messageSender.send("普通消息: " + content);
    }
}

// 扩展抽象 - 紧急消息
class UrgentMessage extends Message {
    private String content;

    public UrgentMessage(MessageSender messageSender, String content) {
        super(messageSender);
        this.content = content;
    }

    @Override
    public void send() {
        messageSender.send("紧急消息: " + content);
    }
}

// 客户端代码
public class Client {
    public static void main(String[] args) {
        MessageSender smsSender = new SMSSender();
        MessageSender emailSender = new EmailSender();

        Message commonSmsMessage = new CommonMessage(smsSender, "这是一条普通短信");
        commonSmsMessage.send();

        Message urgentEmailMessage = new UrgentMessage(emailSender, "这是一条紧急邮件");
        urgentEmailMessage.send();
    }
}
小结
桥接模式是一种很实用的结构型设计模式,它主要用于处理多维度变化的情况。通过将抽象部分与实现部分分离,可以使两者独立变化,减少它们之间的耦合。在实际应用中,如JDBC驱动程序、跨平台应用程序等都使用了桥接模式的思想。使用桥接模式时,需要明确识别系统中的两个独立变化的维度,并分别抽象出来。
8. 组合模式 (Composite Pattern)
概念
组合模式将对象组合成树形结构以表示"部分-整体"的层次结构,使得客户端对单个对象和组合对象的使用具有一致性。
作用
- 表示对象的部分-整体层次结构
- 使客户端对单个对象和组合对象的使用具有一致性
- 方便添加新种类的组件
适用场景
- 需要表示对象的部分-整体层次结构
- 希望客户端忽略组合对象与单个对象的差异
- 处理树形结构时,如文件系统、组织架构等
实现示例
// 组件接口
interface Component {
    void operation();
    void add(Component component);
    void remove(Component component);
    Component getChild(int index);
}

// 叶子组件
class Leaf implements Component {
    private String name;

    public Leaf(String name) {
        this.name = name;
    }

    @Override
    public void operation() {
        System.out.println("叶子组件 " + name + " 的操作");
    }

    @Override
    public void add(Component component) {
        System.out.println("叶子节点不支持添加子节点");
    }

    @Override
    public void remove(Component component) {
        System.out.println("叶子节点不支持移除子节点");
    }

    @Override
    public Component getChild(int index) {
        System.out.println("叶子节点没有子节点");
        return null;
    }
}

// 复合组件
class Composite implements Component {
    private List<Component> children = new ArrayList<>();
    private String name;

    public Composite(String name) {
        this.name = name;
    }

    @Override
    public void operation() {
        System.out.println("复合组件 " + name + " 的操作");
        for (Component component : children) {
            component.operation();
        }
    }

    @Override
    public void add(Component component) {
        children.add(component);
    }

    @Override
    public void remove(Component component) {
        children.remove(component);
    }

    @Override
    public Component getChild(int index) {
        if (index >= 0 && index < children.size()) {
            return children.get(index);
        }
        return null;
    }
}

// 客户端代码
public class Client {
    public static void main(String[] args) {
        // 创建树形结构
        Component root = new Composite("根节点");
        Component branch1 = new Composite("分支1");
        Component branch2 = new Composite("分支2");
        Component leaf1 = new Leaf("叶子1");
        Component leaf2 = new Leaf("叶子2");
        Component leaf3 = new Leaf("叶子3");

        root.add(branch1);
        root.add(branch2);
        branch1.add(leaf1);
        branch1.add(leaf2);
        branch2.add(leaf3);

        // 统一操作
        root.operation();
    }
}
实际应用示例 - 文件系统
// 文件系统组件接口
interface FileSystemComponent {
    void display(int depth);
    long getSize();
    String getName();
}

// 文件类 - 叶子节点
class File implements FileSystemComponent {
    private String name;
    private long size;

    public File(String name, long size) {
        this.name = name;
        this.size = size;
    }

    @Override
    public void display(int depth) {
        StringBuilder indent = new StringBuilder();
        for (int i = 0; i < depth; i++) {
            indent.append("  ");
        }
        System.out.println(indent.toString() + "- " + name + " (" + size + " bytes)");
    }

    @Override
    public long getSize() {
        return size;
    }

    @Override
    public String getName() {
        return name;
    }
}

// 目录类 - 复合节点
class Directory implements FileSystemComponent {
    private String name;
    private List<FileSystemComponent> children = new ArrayList<>();

    public Directory(String name) {
        this.name = name;
    }

    public void add(FileSystemComponent component) {
        children.add(component);
    }

    public void remove(FileSystemComponent component) {
        children.remove(component);
    }

    @Override
    public void display(int depth) {
        StringBuilder indent = new StringBuilder();
        for (int i = 0; i < depth; i++) {
            indent.append("  ");
        }
        System.out.println(indent.toString() + "+ " + name + " (" + getSize() + " bytes)");

        for (FileSystemComponent component : children) {
            component.display(depth + 1);
        }
    }

    @Override
    public long getSize() {
        long totalSize = 0;
        for (FileSystemComponent component : children) {
            totalSize += component.getSize();
        }
        return totalSize;
    }

    @Override
    public String getName() {
        return name;
    }
}

// 客户端代码
public class Client {
    public static void main(String[] args) {
        // 创建文件系统结构
        Directory root = new Directory("root");
        Directory usr = new Directory("usr");
        Directory sys = new Directory("sys");

        root.add(usr);
        root.add(sys);

        usr.add(new File("hello.txt", 1024));
        usr.add(new File("readme.md", 2048));

        Directory java = new Directory("java");
        sys.add(java);
        java.add(new File("App.java", 3072));
        java.add(new File("Config.java", 4096));

        // 显示整个文件系统
        root.display(0);
    }
}
小结
组合模式是一种非常实用的结构型设计模式,特别适合表示具有树形结构的数据。在Java中,很多UI框架如Swing、AWT都大量使用了组合模式。这种模式的关键在于让客户端可以一致地处理单个对象和组合对象,而不必关心处理的是单个对象还是组合对象。组合模式的设计难点在于需要合理地设计Component接口,使之既能满足Leaf的需求,又能满足Composite的需求。
9. 装饰器模式 (Decorator Pattern)
概念
装饰器模式动态地给一个对象添加一些额外的职责,就增加功能来说,它比生成子类更为灵活。
作用
- 动态地给对象添加额外的职责
- 比继承更灵活,避免了类爆炸的问题
- 可以对一个对象多次装饰,得到不同的组合效果
适用场景
- 在不影响其他对象的情况下,以动态、透明的方式给单个对象添加职责
- 处理那些可以撤销的职责
- 当不能采用继承的方式对系统进行扩展或者采用继承不利于系统扩展和维护时
实现示例
// 组件接口
interface Component {
    void operation();
}

// 具体组件
class ConcreteComponent implements Component {
    @Override
    public void operation() {
        System.out.println("具体组件的基本操作");
    }
}

// 装饰器抽象类
abstract class Decorator implements Component {
    protected Component component;

    public Decorator(Component component) {
        this.component = component;
    }

    @Override
    public void operation() {
        component.operation();
    }
}

// 具体装饰器A
class ConcreteDecoratorA extends Decorator {
    public ConcreteDecoratorA(Component component) {
        super(component);
    }

    @Override
    public void operation() {
        super.operation();
        addedBehavior();
    }

    private void addedBehavior() {
        System.out.println("装饰器A添加的功能");
    }
}

// 具体装饰器B
class ConcreteDecoratorB extends Decorator {
    public ConcreteDecoratorB(Component component) {
        super(component);
    }

    @Override
    public void operation() {
        super.operation();
        addedBehavior();
    }

    private void addedBehavior() {
        System.out.println("装饰器B添加的功能");
    }
}

// 客户端代码
public class Client {
    public static void main(String[] args) {
        // 创建具体组件
        Component component = new ConcreteComponent();

        // 用装饰器A装饰
        Component decoratedA = new ConcreteDecoratorA(component);
        decoratedA.operation();

        System.out.println("-------------------------");

        // 用装饰器B装饰
        Component decoratedB = new ConcreteDecoratorB(component);
        decoratedB.operation();

        System.out.println("-------------------------");

        // 用装饰器B装饰已经被装饰器A装饰过的对象
        Component decoratedBA = new ConcreteDecoratorB(new ConcreteDecoratorA(component));
        decoratedBA.operation();
    }
}
实际应用示例 - Java I/O 流
import java.io.*;

public class DecoratorExample {
    public static void main(String[] args) throws IOException {
        // 创建基本的字节流
        InputStream fileInputStream = new FileInputStream("test.txt");

        // 用BufferedInputStream装饰
        InputStream bufferedInputStream = new BufferedInputStream(fileInputStream);

        // 再用DataInputStream装饰
        DataInputStream dataInputStream = new DataInputStream(bufferedInputStream);

        // 现在可以使用DataInputStream的方法
        int intValue = dataInputStream.readInt();
        String stringValue = dataInputStream.readUTF();

        // 关闭流
        dataInputStream.close();
    }
}
小结
装饰器模式是一种非常灵活的结构型设计模式,它允许在运行时动态地为对象添加功能,而不需要修改对象的结构。在Java中,最著名的应用就是Java I/O类库,例如InputStream及其各种装饰器如BufferedInputStream、DataInputStream等。使用装饰器模式的优点是可以灵活地组合功能,但缺点是会产生很多小的对象,增加了系统的复杂性。当需要为一个类添加多种可选的功能时,装饰器模式是一个很好的选择。
10. 外观模式 (Facade Pattern)
概念
外观模式为子系统中的一组接口提供一个一致的界面,定义一个高层接口,这个接口使得这一子系统更加容易使用。
作用
- 为复杂的子系统提供一个简单的接口
- 降低客户端与子系统的耦合度
- 提供一个高层的接口,使子系统更易于使用
适用场景
- 为复杂子系统提供一个简单接口
- 客户端与多个子系统之间存在很大的依赖性
- 需要构建一个层次结构的子系统时
实现示例
// 子系统类A
class SubSystemA {
    public void operationA() {
        System.out.println("子系统A的操作");
    }
}

// 子系统类B
class SubSystemB {
    public void operationB() {
        System.out.println("子系统B的操作");
    }
}

// 子系统类C
class SubSystemC {
    public void operationC() {
        System.out.println("子系统C的操作");
    }
}

// 外观类
class Facade {
    private SubSystemA subSystemA;
    private SubSystemB subSystemB;
    private SubSystemC subSystemC;

    public Facade() {
        subSystemA = new SubSystemA();
        subSystemB = new SubSystemB();
        subSystemC = new SubSystemC();
    }

    // 对外接口
    public void operation1() {
        System.out.println("操作1开始");
        subSystemA.operationA();
        subSystemB.operationB();
        System.out.println("操作1结束");
    }

    public void operation2() {
        System.out.println("操作2开始");
        subSystemB.operationB();
        subSystemC.operationC();
        System.out.println("操作2结束");
    }
}

// 客户端代码
public class Client {
    public static void main(String[] args) {
        Facade facade = new Facade();

        facade.operation1();
        System.out.println("-------------------------");
        facade.operation2();
    }
}
实际应用示例 - 家庭影院系统
// 子系统 - 灯光
class Light {
    public void on() {
        System.out.println("灯光已打开");
    }

    public void dim() {
        System.out.println("灯光已调暗");
    }

    public void off() {
        System.out.println("灯光已关闭");
    }
}

// 子系统 - 投影仪
class Projector {
    public void on() {
        System.out.println("投影仪已打开");
    }

    public void off() {
        System.out.println("投影仪已关闭");
    }

    public void setInput(String input) {
        System.out.println("投影仪输入源设置为:" + input);
    }
}

// 子系统 - 音响
class SoundSystem {
    public void on() {
        System.out.println("音响已打开");
    }

    public void off() {
        System.out.println("音响已关闭");
    }

    public void setVolume(int volume) {
        System.out.println("音响音量设置为:" + volume);
    }
}

// 子系统 - DVD播放器
class DvdPlayer {
    public void on() {
        System.out.println("DVD播放器已打开");
    }

    public void off() {
        System.out.println("DVD播放器已关闭");
    }

    public void play(String movie) {
        System.out.println("正在播放电影:" + movie);
    }

    public void stop() {
        System.out.println("DVD播放器已停止播放");
    }
}

// 外观 - 家庭影院外观
class HomeTheaterFacade {
    private Light light;
    private Projector projector;
    private SoundSystem soundSystem;
    private DvdPlayer dvdPlayer;

    public HomeTheaterFacade() {
        light = new Light();
        projector = new Projector();
        soundSystem = new SoundSystem();
        dvdPlayer = new DvdPlayer();
    }

    // 对外提供的简化接口 - 观影模式
    public void watchMovie(String movie) {
        System.out.println("=== 准备观影 ===");
        light.dim();
        projector.on();
        projector.setInput("DVD");
        soundSystem.on();
        soundSystem.setVolume(15);
        dvdPlayer.on();
        dvdPlayer.play(movie);
    }

    // 对外提供的简化接口 - 结束观影
    public void endMovie() {
        System.out.println("=== 结束观影 ===");
        dvdPlayer.stop();
        dvdPlayer.off();
        soundSystem.off();
        projector.off();
        light.on();
    }
}

// 客户端代码
public class Client {
    public static void main(String[] args) {
        HomeTheaterFacade homeTheater = new HomeTheaterFacade();

        homeTheater.watchMovie("星际穿越");
        System.out.println("-------------------------");
        homeTheater.endMovie();
    }
}
小结
外观模式是一种非常实用的结构型设计模式,它主要用于简化复杂子系统的使用。通过提供一个统一的接口,客户端不需要了解子系统的内部复杂性,只需要通过外观类来与子系统进行交互。外观模式在实际开发中应用广泛,尤其是在需要与复杂的库、框架或子系统交互时。使用外观模式的好处是降低了系统的耦合度,提高了系统的可维护性和可读性。但需要注意的是,外观模式不应该成为一个独立的抽象层次,不应该强制客户端必须通过外观类访问子系统。
11. 享元模式 (Flyweight Pattern)
概念
享元模式运用共享技术有效地支持大量细粒度的对象,减少创建的对象数量,以减少内存占用和提高性能。
作用
- 减少对象的创建,降低系统的内存占用
- 提高系统的性能
- 实现对象的复用
适用场景
- 系统中有大量相似对象,造成内存开销
- 大部分对象的状态可以外部化,剥离后可以用较少的共享对象取代
- 需要缓冲池的场景
实现示例
// 享元接口
interface Flyweight {
    void operation(String extrinsicState);
}

// 具体享元类
class ConcreteFlyweight implements Flyweight {
    private String intrinsicState;

    public ConcreteFlyweight(String intrinsicState) {
        this.intrinsicState = intrinsicState;
    }

    @Override
    public void operation(String extrinsicState) {
        System.out.println("内部状态:" + intrinsicState + ",外部状态:" + extrinsicState);
    }
}

// 享元工厂
class FlyweightFactory {
    private Map<String, Flyweight> flyweights = new HashMap<>();

    public Flyweight getFlyweight(String key) {
        if (!flyweights.containsKey(key)) {
            flyweights.put(key, new ConcreteFlyweight(key));
        }
        return flyweights.get(key);
    }

    public int getFlyweightCount() {
        return flyweights.size();
    }
}

// 客户端代码
public class Client {
    public static void main(String[] args) {
        FlyweightFactory factory = new FlyweightFactory();

        // 获取享元对象
        Flyweight fw1 = factory.getFlyweight("A");
        fw1.operation("第一次调用");

        Flyweight fw2 = factory.getFlyweight("B");
        fw2.operation("第二次调用");

        Flyweight fw3 = factory.getFlyweight("A");  // 复用已有对象
        fw3.operation("第三次调用");

        System.out.println("享元池中对象数量:" + factory.getFlyweightCount());
    }
}
实际应用示例 - 文本编辑器中的字符渲染
// 字符享元类
class CharacterFlyweight {
    private char character;
    private String font;
    private int size;

    public CharacterFlyweight(char character, String font, int size) {
        this.character = character;
        this.font = font;
        this.size = size;
    }

    public void display(int x, int y, String color) {
        System.out.println("显示字符 '" + character + "' 在位置 (" + x + "," + y + ")," +
                           "颜色为 " + color + ",字体为 " + font + ",大小为 " + size);
    }
}

// 字符享元工厂
class CharacterFactory {
    private Map<String, CharacterFlyweight> characters = new HashMap<>();

    public CharacterFlyweight getCharacter(char character, String font, int size) {
        String key = character + font + size;
        if (!characters.containsKey(key)) {
            characters.put(key, new CharacterFlyweight(character, font, size));
            System.out.println("创建新的字符对象:" + character);
        } else {
            System.out.println("复用已有字符对象:" + character);
        }
        return characters.get(key);
    }

    public int getCharacterCount() {
        return characters.size();
    }
}

// 文本编辑器类
class TextEditor {
    private CharacterFactory factory;

    public TextEditor() {
        factory = new CharacterFactory();
    }

    public void displayText(String text, String font, int size) {
        int x = 0;
        for (int i = 0; i < text.length(); i++) {
            char currentChar = text.charAt(i);
            String color = (i % 2 == 0) ? "红色" : "蓝色";  // 外部状态
            CharacterFlyweight charObj = factory.getCharacter(currentChar, font, size);
            charObj.display(x, 0, color);
            x += 10;  // 简单起见,每个字符占10个单位宽度
        }
        System.out.println("总共使用了 " + factory.getCharacterCount() + " 个字符对象");
    }
}

// 客户端代码
public class Client {
    public static void main(String[] args) {
        TextEditor editor = new TextEditor();
        editor.displayText("Hello, world!", "Arial", 12);
    }
}
学习心
享元模式是一种结构型设计模式,它通过共享技术来有效支持大量细粒度的对象。在享元模式中,对象的内部状态是存储在享元对象内部的,而对象的外部状态则由客户端保存并在使用时传入享元对象。这种模式在处理大量相似对象时非常有用,可以显著减少内存占用。在Java中,String池、Integer缓存等都是享元模式的应用。在实际应用中,需要明确区分对象的内部状态和外部状态,只有当内部状态可以共享时,才适合使用享元模式。
12. 代理模式 (Proxy Pattern)
概念
代理模式为其他对象提供一种代理以控制对这个对象的访问。代理对象在客户端和目标对象之间起到中介的作用,可以在不修改目标对象代码的情况下,增强目标对象的功能或控制对目标对象的访问。
作用
- 控制对目标对象的访问
- 在不修改目标对象的前提下,增强目标对象的功能
- 延迟目标对象的实例化和初始化,节省资源
适用场景
- 远程代理:为远程的对象提供代理
- 虚拟代理:根据需要创建开销很大的对象
- 保护代理:控制对原始对象的访问,用于对象有不同访问权限时
- 智能引用:在访问对象时执行一些附加操作,例如计算引用次数
实现示例 - 静态代理
// 主题接口
interface Subject {
    void request();
}

// 真实主题
class RealSubject implements Subject {
    @Override
    public void request() {
        System.out.println("RealSubject处理请求");
    }
}

// 代理
class Proxy implements Subject {
    private RealSubject realSubject;

    public Proxy() {
        this.realSubject = new RealSubject();
    }

    @Override
    public void request() {
        preRequest();
        realSubject.request();
        postRequest();
    }

    private void preRequest() {
        System.out.println("Proxy在请求前的预处理");
    }

    private void postRequest() {
        System.out.println("Proxy在请求后的后处理");
    }
}

// 客户端代码
public class Client {
    public static void main(String[] args) {
        Subject proxy = new Proxy();
        proxy.request();
    }
}
实现示例 - 动态代理
import java.lang.reflect.InvocationHandler;
import java.lang.reflect.Method;
import java.lang.reflect.Proxy;

// 主题接口
interface Subject {
    void request();
}

// 真实主题
class RealSubject implements Subject {
    @Override
    public void request() {
        System.out.println("RealSubject处理请求");
    }
}

// 动态代理处理器
class DynamicProxyHandler implements InvocationHandler {
    private Object target;

    public DynamicProxyHandler(Object target) {
        this.target = target;
    }

    @Override
    public Object invoke(Object proxy, Method method, Object[] args) throws Throwable {
        preRequest();
        Object result = method.invoke(target, args);
        postRequest();
        return result;
    }

    private void preRequest() {
        System.out.println("DynamicProxy在请求前的预处理");
    }

    private void postRequest() {
        System.out.println("DynamicProxy在请求后的后处理");
    }
}

// 客户端代码
public class Client {
    public static void main(String[] args) {
        RealSubject realSubject = new RealSubject();

        // 创建动态代理
        Subject proxy = (Subject) Proxy.newProxyInstance(
            realSubject.getClass().getClassLoader(),
            realSubject.getClass().getInterfaces(),
            new DynamicProxyHandler(realSubject)
        );

        proxy.request();
    }
}
实际应用示例 - Spring AOP
// 假设这是业务服务接口
interface UserService {
    void addUser(String username);
    void deleteUser(String username);
}

// 实际的业务实现
class UserServiceImpl implements UserService {
    @Override
    public void addUser(String username) {
        System.out.println("添加用户:" + username);
    }

    @Override
    public void deleteUser(String username) {
        System.out.println("删除用户:" + username);
    }
}


// 日志切面(模拟Spring AOP的实现)
class LoggingAspect implements InvocationHandler {
    private Object target;

    public LoggingAspect(Object target) {
        this.target = target;
    }

    @Override
    public Object invoke(Object proxy, Method method, Object[] args) throws Throwable {
        String methodName = method.getName();
        System.out.println("[日志] 准备执行方法:" + methodName + ",参数:" + Arrays.toString(args));

        long startTime = System.currentTimeMillis();
        Object result = method.invoke(target, args);
        long endTime = System.currentTimeMillis();

        System.out.println("[日志] 方法执行完成:" + methodName + ",耗时:" + (endTime - startTime) + "ms");
        return result;
    }
}

// 代理工厂(模拟Spring AOP的ProxyFactory)
class ProxyFactory {
    public static Object createProxy(Object target) {
        return Proxy.newProxyInstance(
            target.getClass().getClassLoader(),
            target.getClass().getInterfaces(),
            new LoggingAspect(target)
        );
    }
}

// 客户端代码
public class Client {
    public static void main(String[] args) {
        UserService userService = (UserService) ProxyFactory.createProxy(new UserServiceImpl());

        userService.addUser("张三");
        userService.deleteUser("李四");
    }
}
小结
代理模式是一种非常有用的结构型设计模式,它可以在不修改目标对象的前提下,对目标对象进行功能扩展或控制访问。在Java中,代理模式有静态代理和动态代理两种实现方式。静态代理在编译时就确定了代理关系,而动态代理则是在运行时动态生成代理类。
Java中的动态代理主要有JDK动态代理和CGLIB动态代理两种。JDK动态代理要求目标对象实现接口,而CGLIB动态代理则通过继承目标类来实现代理。Spring AOP就是基于这两种动态代理实现的。
代理模式在实际开发中应用广泛,例如Spring AOP、远程方法调用(RMI)、数据库连接池等。使用代理模式的好处是可以将与业务无关的功能(如日志、事务、权限控制等)从业务代码中分离出来,提高代码的可维护性和可重用性。
行为型模式
13. 责任链模式 (Chain of Responsibility Pattern)
概念
责任链模式是一种行为设计模式,它允许多个对象都有机会处理请求,从而避免请求的发送者和接收者之间的耦合关系。将这些对象连成一条链,并沿着这条链传递请求,直到有一个对象处理它为止。
作用
- 将请求的发送者和接收者解耦
- 可以动态地改变链中的处理者顺序或添加新的处理者
- 每个处理者只需关注自己能处理的请求
适用场景
- 有多个对象可以处理同一个请求,但具体由哪个对象处理由运行时决定
- 在不明确指定接收者的情况下,向多个对象中的一个提交请求
- 需要动态指定一组对象处理请求的场景
实现示例
// 请求类
class Request {
    private String type;
    private String content;
    private int level;

    public Request(String type, String content, int level) {
        this.type = type;
        this.content = content;
        this.level = level;
    }

    public String getType() {
        return type;
    }

    public String getContent() {
        return content;
    }

    public int getLevel() {
        return level;
    }
}

// 处理者抽象类
abstract class Handler {
    protected Handler successor;
    protected int level;

    public void setSuccessor(Handler successor) {
        this.successor = successor;
    }

    public Handler(int level) {
        this.level = level;
    }

    public void handleRequest(Request request) {
        if (request.getLevel() <= level) {
            process(request);
        } else if (successor != null) {
            successor.handleRequest(request);
        } else {
            System.out.println("没有处理者能处理该请求");
        }
    }

    // 具体处理方法
    protected abstract void process(Request request);
}

// 具体处理者A
class ConcreteHandlerA extends Handler {
    public ConcreteHandlerA(int level) {
        super(level);
    }

    @Override
    protected void process(Request request) {
        System.out.println("处理者A处理请求:" + request.getContent());
    }
}

// 具体处理者B
class ConcreteHandlerB extends Handler {
    public ConcreteHandlerB(int level) {
        super(level);
    }

    @Override
    protected void process(Request request) {
        System.out.println("处理者B处理请求:" + request.getContent());
    }
}

// 具体处理者C
class ConcreteHandlerC extends Handler {
    public ConcreteHandlerC(int level) {
        super(level);
    }

    @Override
    protected void process(Request request) {
        System.out.println("处理者C处理请求:" + request.getContent());
    }
}

// 客户端代码
public class Client {
    public static void main(String[] args) {
        // 创建处理者
        Handler handlerA = new ConcreteHandlerA(1);
        Handler handlerB = new ConcreteHandlerB(2);
        Handler handlerC = new ConcreteHandlerC(3);

        // 设置责任链
        handlerA.setSuccessor(handlerB);
        handlerB.setSuccessor(handlerC);

        // 创建请求并发送
        Request request1 = new Request("类型1", "请求1内容", 1);
        Request request2 = new Request("类型2", "请求2内容", 2);
        Request request3 = new Request("类型3", "请求3内容", 3);
        Request request4 = new Request("类型4", "请求4内容", 4);

        handlerA.handleRequest(request1); // 由处理者A处理
        handlerA.handleRequest(request2); // 由处理者B处理
        handlerA.handleRequest(request3); // 由处理者C处理
        handlerA.handleRequest(request4); // 没有处理者能处理
    }
}
实际应用示例 - 日志级别处理
// 日志请求
class LogRequest {
    public static final int DEBUG = 1;
    public static final int INFO = 2;
    public static final int WARNING = 3;
    public static final int ERROR = 4;

    private int level;
    private String message;

    public LogRequest(int level, String message) {
        this.level = level;
        this.message = message;
    }

    public int getLevel() {
        return level;
    }

    public String getMessage() {
        return message;
    }
}

// 日志处理器抽象类
abstract class LoggerHandler {
    protected LoggerHandler nextLogger;
    protected int level;

    public void setNextLogger(LoggerHandler nextLogger) {
        this.nextLogger = nextLogger;
    }

    public void logMessage(LogRequest request) {
        if (request.getLevel() >= level) {
            write(request);
        }
        if (nextLogger != null) {
            nextLogger.logMessage(request);
        }
    }

    abstract protected void write(LogRequest request);
}

// 控制台日志处理器
class ConsoleLogger extends LoggerHandler {
    public ConsoleLogger(int level) {
        this.level = level;
    }

    @Override
    protected void write(LogRequest request) {
        System.out.println("控制台日志: [" + getLevelString(request.getLevel()) + "] " + request.getMessage());
    }

    private String getLevelString(int level) {
        switch (level) {
            case LogRequest.DEBUG: return "DEBUG";
            case LogRequest.INFO: return "INFO";
            case LogRequest.WARNING: return "WARNING";
            case LogRequest.ERROR: return "ERROR";
            default: return "UNKNOWN";
        }
    }
}

// 文件日志处理器
class FileLogger extends LoggerHandler {
    public FileLogger(int level) {
        this.level = level;
    }

    @Override
    protected void write(LogRequest request) {
        System.out.println("文件日志: [" + getLevelString(request.getLevel()) + "] " + request.getMessage());
    }

    private String getLevelString(int level) {
        switch (level) {
            case LogRequest.DEBUG: return "DEBUG";
            case LogRequest.INFO: return "INFO";
            case LogRequest.WARNING: return "WARNING";
            case LogRequest.ERROR: return "ERROR";
            default: return "UNKNOWN";
        }
    }
}

// 邮件日志处理器
class EmailLogger extends LoggerHandler {
    public EmailLogger(int level) {
        this.level = level;
    }

    @Override
    protected void write(LogRequest request) {
        System.out.println("邮件日志: [" + getLevelString(request.getLevel()) + "] " + request.getMessage());
    }

    private String getLevelString(int level) {
        switch (level) {
            case LogRequest.DEBUG: return "DEBUG";
            case LogRequest.INFO: return "INFO";
            case LogRequest.WARNING: return "WARNING";
            case LogRequest.ERROR: return "ERROR";
            default: return "UNKNOWN";
        }
    }
}

// 客户端代码
public class Client {
    public static void main(String[] args) {
        // 创建日志处理器
        LoggerHandler consoleLogger = new ConsoleLogger(LogRequest.DEBUG);
        LoggerHandler fileLogger = new FileLogger(LogRequest.INFO);
        LoggerHandler emailLogger = new EmailLogger(LogRequest.ERROR);

        // 设置责任链
        consoleLogger.setNextLogger(fileLogger);
        fileLogger.setNextLogger(emailLogger);

        // 创建并处理日志请求
        System.out.println("=== DEBUG级别日志 ===");
        consoleLogger.logMessage(new LogRequest(LogRequest.DEBUG, "这是一条调试信息"));

        System.out.println("\n=== INFO级别日志 ===");
        consoleLogger.logMessage(new LogRequest(LogRequest.INFO, "这是一条普通信息"));

        System.out.println("\n=== WARNING级别日志 ===");
        consoleLogger.logMessage(new LogRequest(LogRequest.WARNING, "这是一条警告信息"));

        System.out.println("\n=== ERROR级别日志 ===");
        consoleLogger.logMessage(new LogRequest(LogRequest.ERROR, "这是一条错误信息"));
    }
}
小结
责任链模式是一种非常实用的行为型设计模式,特别适合处理多级处理的场景。在实际应用中,责任链模式常用于请求的过滤和处理、异常的捕获和处理等场景。Java中的Servlet过滤器链、日志框架、Spring Security的过滤器链等都使用了责任链模式。
责任链模式的优点是请求发送者和接收者解耦,可以动态调整处理者的顺序或添加新的处理者。但缺点是请求可能找不到合适的处理者,导致请求被丢弃,或者责任链太长影响性能。在使用责任链模式时,应确保至少有一个处理者能处理请求,或者提供一个默认的处理者。
14. 命令模式 (Command Pattern)
概念
命令模式是一种行为设计模式,它将请求封装成一个对象,从而使你可用不同的请求对客户进行参数化,对请求排队或记录请求日志,以及支持可撤销的操作。
作用
- 将请求发送者和接收者解耦
- 可以将命令对象存储在队列中
- 支持可撤销操作
- 可以组合成复杂的命令
适用场景
- 需要将请求发送者和接收者解耦
- 需要将请求参数化
- 需要支持撤销/重做功能
- 需要将命令排队、日志记录等
实现示例
// 命令接口
interface Command {
    void execute();
}

// 接收者
class Receiver {
    public void action() {
        System.out.println("接收者执行操作");
    }
}

// 具体命令
class ConcreteCommand implements Command {
    private Receiver receiver;

    public ConcreteCommand(Receiver receiver) {
        this.receiver = receiver;
    }

    @Override
    public void execute() {
        receiver.action();
    }
}

// 调用者
class Invoker {
    private Command command;

    public void setCommand(Command command) {
        this.command = command;
    }

    public void executeCommand() {
        command.execute();
    }
}

// 客户端代码
public class Client {
    public static void main(String[] args) {
        // 创建接收者
        Receiver receiver = new Receiver();

        // 创建命令对象,设定接收者
        Command command = new ConcreteCommand(receiver);

        // 创建调用者,把命令对象设置进去
        Invoker invoker = new Invoker();
        invoker.setCommand(command);

        // 调用者执行命令
        invoker.executeCommand();
    }
}
实现示例 - 支持撤销操作的命令模式
// 命令接口
interface Command {
    void execute();
    void undo();
}

// 接收者 - 电视机
class TV {
    private boolean isOn = false;
    private int volume = 10;
    private int channel = 1;

    public void turnOn() {
        isOn = true;
        System.out.println("电视机打开了");
    }

    public void turnOff() {
        isOn = false;
        System.out.println("电视机关闭了");
    }

    public void volumeUp() {
        if (isOn && volume < 100) {
            volume++;
            System.out.println("音量增加到 " + volume);
        }
    }

    public void volumeDown() {
        if (isOn && volume > 0) {
            volume--;
            System.out.println("音量减小到 " + volume);
        }
    }

    public void channelUp() {
        if (isOn) {
            channel++;
            System.out.println("频道切换到 " + channel);
        }
    }

    public void channelDown() {
        if (isOn && channel > 1) {
            channel--;
            System.out.println("频道切换到 " + channel);
        }
    }
}

// 打开电视命令
class TurnOnCommand implements Command {
    private TV tv;

    public TurnOnCommand(TV tv) {
        this.tv = tv;
    }

    @Override
    public void execute() {
        tv.turnOn();
    }

    @Override
    public void undo() {
        tv.turnOff();
    }
}

// 关闭电视命令
class TurnOffCommand implements Command {
    private TV tv;

    public TurnOffCommand(TV tv) {
        this.tv = tv;
    }

    @Override
    public void execute() {
        tv.turnOff();
    }

    @Override
    public void undo() {
        tv.turnOn();
    }
}

// 音量增加命令
class VolumeUpCommand implements Command {
    private TV tv;

    public VolumeUpCommand(TV tv) {
        this.tv = tv;
    }

    @Override
    public void execute() {
        tv.volumeUp();
    }

    @Override
    public void undo() {
        tv.volumeDown();
    }
}

// 音量减小命令
class VolumeDownCommand implements Command {
    private TV tv;

    public VolumeDownCommand(TV tv) {
        this.tv = tv;
    }

    @Override
    public void execute() {
        tv.volumeDown();
    }

    @Override
    public void undo() {
        tv.volumeUp();
    }
}

// 遥控器 - 调用者
class RemoteControl {
    private Command command;
    private Stack<Command> commandHistory = new Stack<>();

    public void setCommand(Command command) {
        this.command = command;
    }

    public void pressButton() {
        command.execute();
        commandHistory.push(command);
    }

    public void pressUndo() {
        if (!commandHistory.isEmpty()) {
            Command lastCommand = commandHistory.pop();
            lastCommand.undo();
        }
    }
}

// 客户端代码
public class Client {
    public static void main(String[] args) {
        // 创建接收者
        TV tv = new TV();

        // 创建命令
        Command turnOn = new TurnOnCommand(tv);
        Command volumeUp = new VolumeUpCommand(tv);
        Command volumeDown = new VolumeDownCommand(tv);
        Command turnOff = new TurnOffCommand(tv);

        // 创建调用者
        RemoteControl remote = new RemoteControl();

        // 执行命令
        remote.setCommand(turnOn);
        remote.pressButton();

        remote.setCommand(volumeUp);
        remote.pressButton();
        remote.pressButton();

        remote.setCommand(volumeDown);
        remote.pressButton();

        // 撤销操作
        System.out.println("\n撤销操作:");
        remote.pressUndo(); // 撤销音量减小
        remote.pressUndo(); // 撤销音量增加
        remote.pressUndo(); // 撤销音量增加
        remote.pressUndo(); // 撤销打开电视
    }
}
实际应用示例 - GUI操作的命令模式
// 命令接口
interface Command {
    void execute();
    void undo();
}

// 接收者 - 文本编辑器
class TextEditor {
    private StringBuilder text = new StringBuilder();

    public void addText(String text) {
        this.text.append(text);
        System.out.println("添加文本:" + text);
        System.out.println("当前文本:" + this.text);
    }

    public void deleteText(int length) {
        int textLength = text.length();
        if (length > 0 && textLength >= length) {
            String deletedText = text.substring(textLength - length);
            text.delete(textLength - length, textLength);
            System.out.println("删除文本:" + deletedText);
            System.out.println("当前文本:" + this.text);
        }
    }
}

// 添加文本命令
class AddTextCommand implements Command {
    private TextEditor editor;
    private String text;

    public AddTextCommand(TextEditor editor, String text) {
        this.editor = editor;
        this.text = text;
    }

    @Override
    public void execute() {
        editor.addText(text);
    }

    @Override
    public void undo() {
        editor.deleteText(text.length());
    }
}

// 删除文本命令
class DeleteTextCommand implements Command {
    private TextEditor editor;
    private int length;
    private String deletedText;

    public DeleteTextCommand(TextEditor editor, int length) {
        this.editor = editor;
        this.length = length;
    }

    @Override
    public void execute() {
        editor.deleteText(length);
    }

    @Override
    public void undo() {
        editor.addText(deletedText);
    }
}

// GUI菜单 - 调用者
class Menu {
    private Command command;
    private Stack<Command> undoStack = new Stack<>();
    private Stack<Command> redoStack = new Stack<>();

    public void setCommand(Command command) {
        this.command = command;
    }

    public void executeCommand() {
        if (command != null) {
            command.execute();
            undoStack.push(command);
            redoStack.clear();
        }
    }

    public void undo() {
        if (!undoStack.isEmpty()) {
            Command command = undoStack.pop();
            command.undo();
            redoStack.push(command);
        } else {
            System.out.println("没有可撤销的操作");
        }
    }

    public void redo() {
        if (!redoStack.isEmpty()) {
            Command command = redoStack.pop();
            command.execute();
            undoStack.push(command);
        } else {
            System.out.println("没有可重做的操作");
        }
    }
}

// 客户端代码
public class Client {
    public static void main(String[] args) {
        // 创建接收者
        TextEditor editor = new TextEditor();

        // 创建菜单
        Menu menu = new Menu();

        // 执行添加文本操作
        Command addHello = new AddTextCommand(editor, "Hello, ");
        menu.setCommand(addHello);
        menu.executeCommand();

        Command addWorld = new AddTextCommand(editor, "World!");
        menu.setCommand(addWorld);
        menu.executeCommand();

        // 撤销操作
        System.out.println("\n撤销操作:");
        menu.undo();

        // 执行新的操作
        Command addJava = new AddTextCommand(editor, "Java!");
        menu.setCommand(addJava);
        menu.executeCommand();

        // 再次撤销
        System.out.println("\n撤销操作:");
        menu.undo();

        // 重做操作
        System.out.println("\n重做操作:");
        menu.redo();
    }
}
小结
命令模式是一种非常灵活的行为型设计模式,它可以将请求封装成一个对象,使得可以用不同的请求对客户进行参数化。在实际应用中,命令模式常用于实现撤销/重做功能、事务处理、队列请求和日志记录等场景。
命令模式的主要优点是将请求发送者和接收者解耦,实现了请求发送者和接收者之间的松耦合。它还可以很容易地实现命令的组合和撤销/重做功能。但缺点是可能会导致系统中存在过多的具体命令类。
在Java中,Runnable接口和线程池的设计就采用了命令模式的思想,将任务请求封装成Runnable对象,由线程池来调度执行。此外,JDBC的事务处理、Struts2的Action等也都用到了命令模式的思想。